# Cost Explorer In AWS
- The easy-to-use interface of AWS Cost Explorer helps you to monitor, understand, and track your AWS costs and consumption over time.
- The AWS Cost Explorer API enables you to directly access the AWS Cost Explorer driven interactive, ad-hoc query engine. A cost of $0.01 will be incurred for each request.
- The granularity of the Cost Explorer Hourly and Resource level allows you to view the last 14 days of hourly granularity and resource level granularity for EC2 instances. The cost is $0.01 per 1,000 UsageRecords month.
- Let's consider the case, user has 50 instances (all regions) in his account. If you want to fetch the cost & usage for each EC2 resource, it will cost the user $0.01. If any other user does the same, then it will cost again $0.01.
- If you are checking this cost daily then it will cost a lot just for viewing the price user has spent on AWS. If you don't want to spend the cost on viewing the data repeatedly as in the case we fetch the data and use a cache mechanism. So the user doesn't have to spend the cost to view the data which was seen before.
# Enabling Access To Cost Explorer
By default this dashboard is disabled. Any user who wishes to see this dashboard needs to enable it from the master account.
- Go to AWS Management Console and sign in with master account.
- In the right corner, you will see the master account name. Click on the name and in the dropdown options select Billing and Cost Management option.
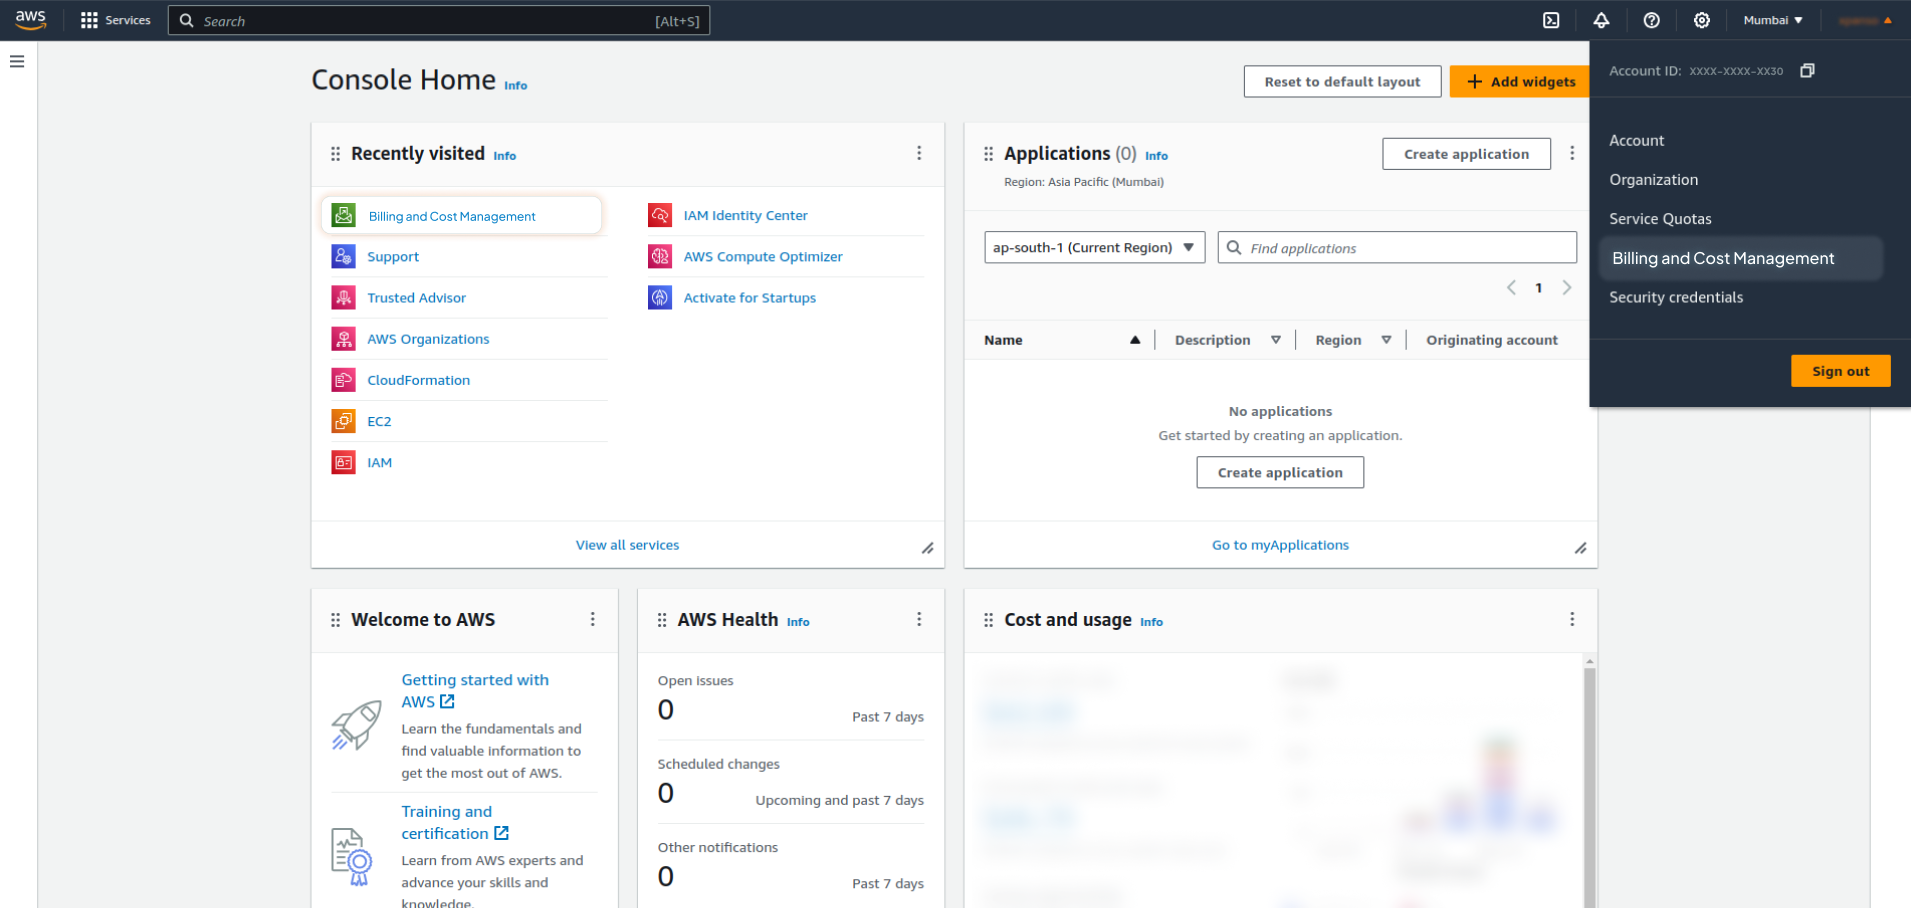
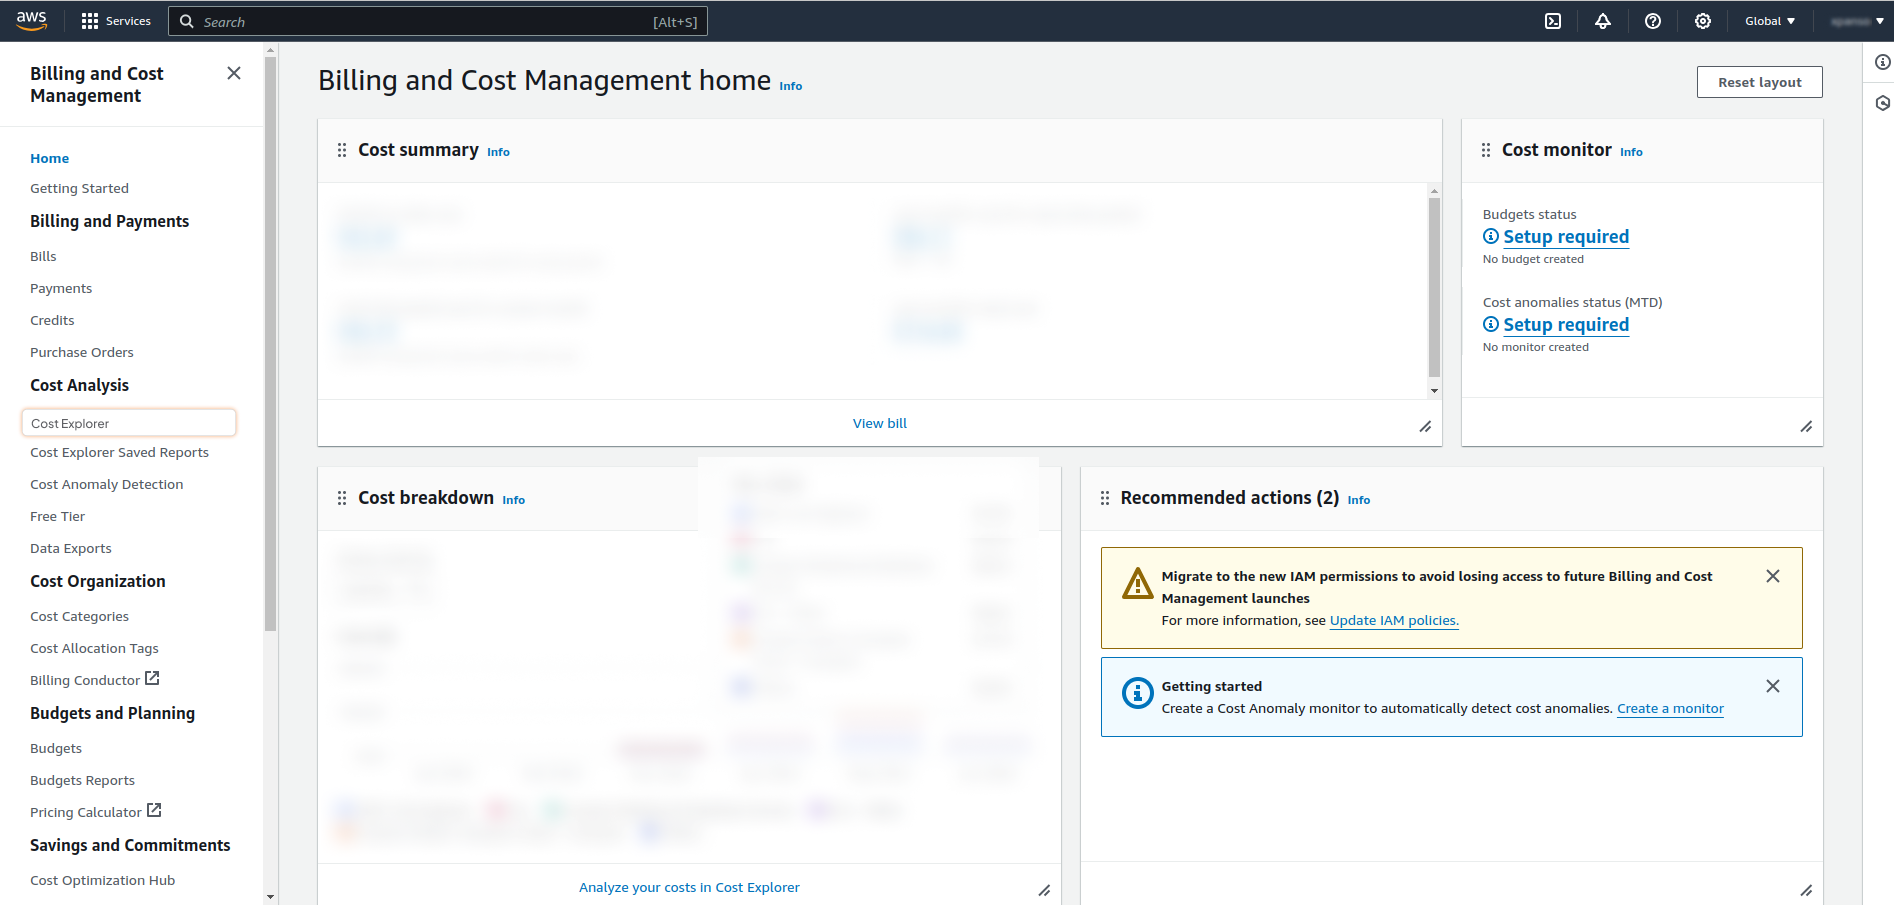
- On the Billing and Cost Management home page, in the left panel, click on the Cost Explorer.
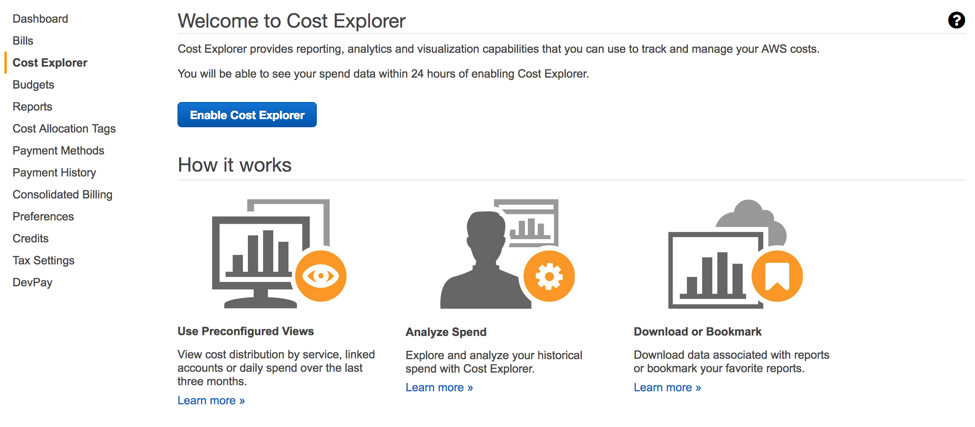
- On the Cost Explorer page, choose Enable Cost Explorer.
- After enabling the Cost Explorer option in the previous step, it generally takes 24 hours for data to reflect on the Cost Explorer (Home) page. Once the Cost Explorer (Home) page is visible, click on Cost Management Preferences in the left panel.
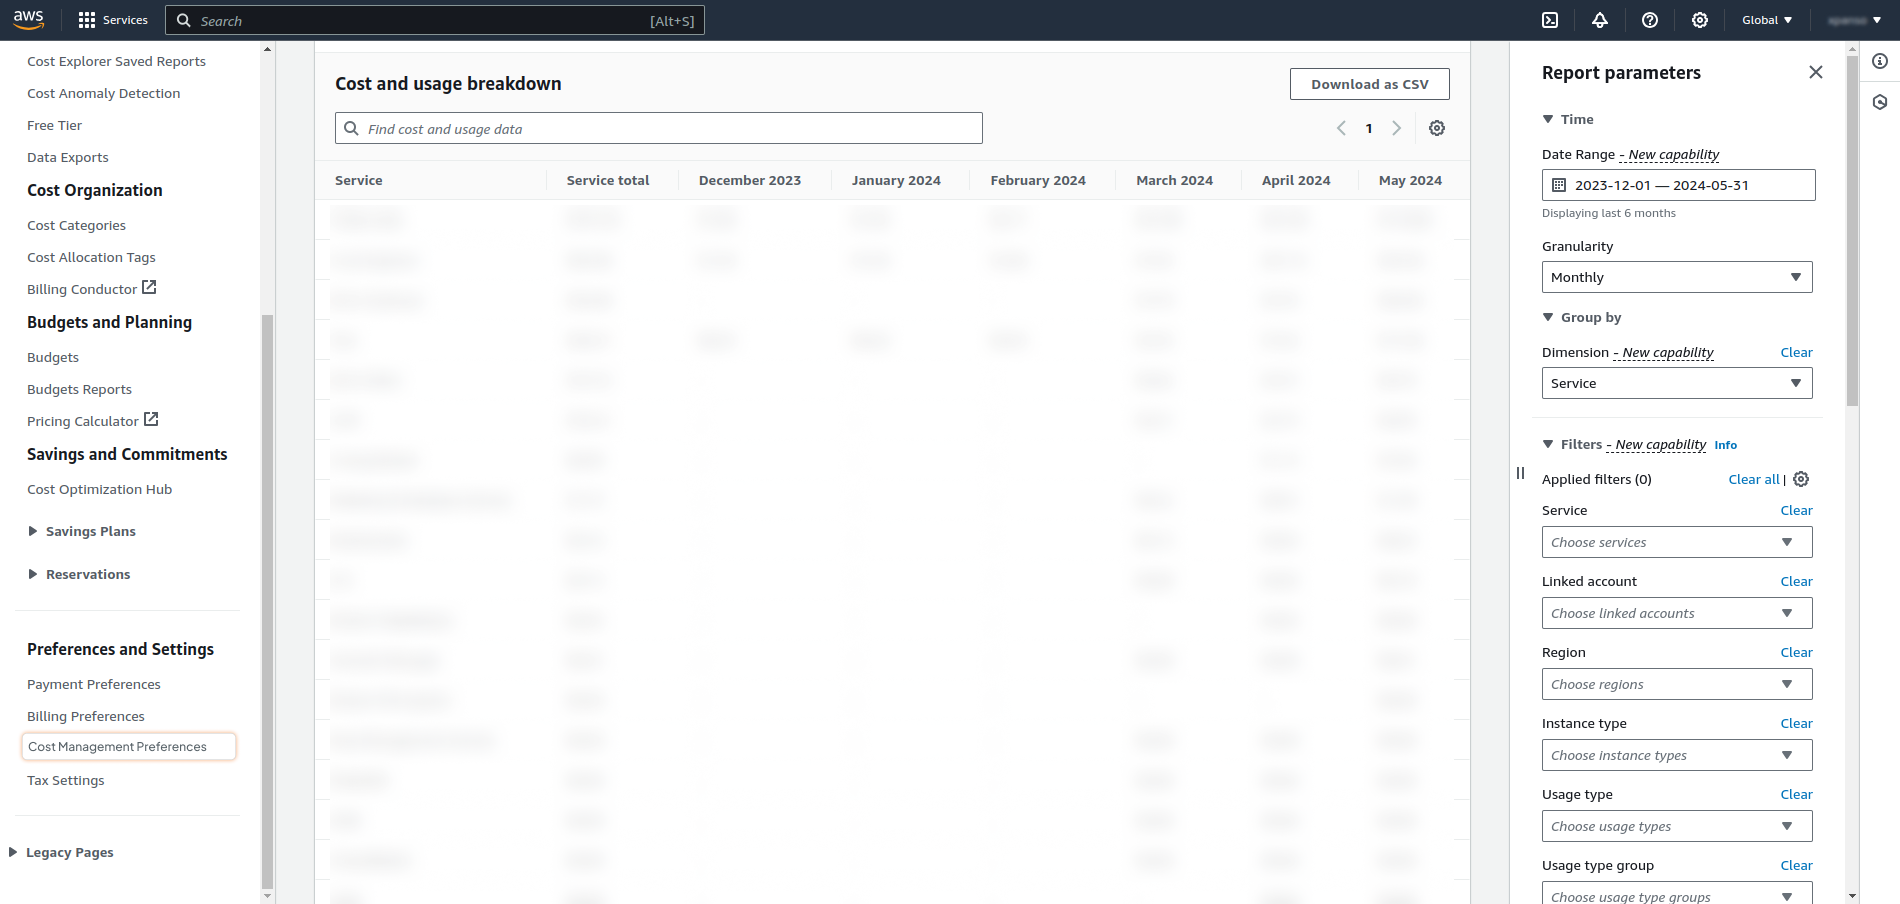
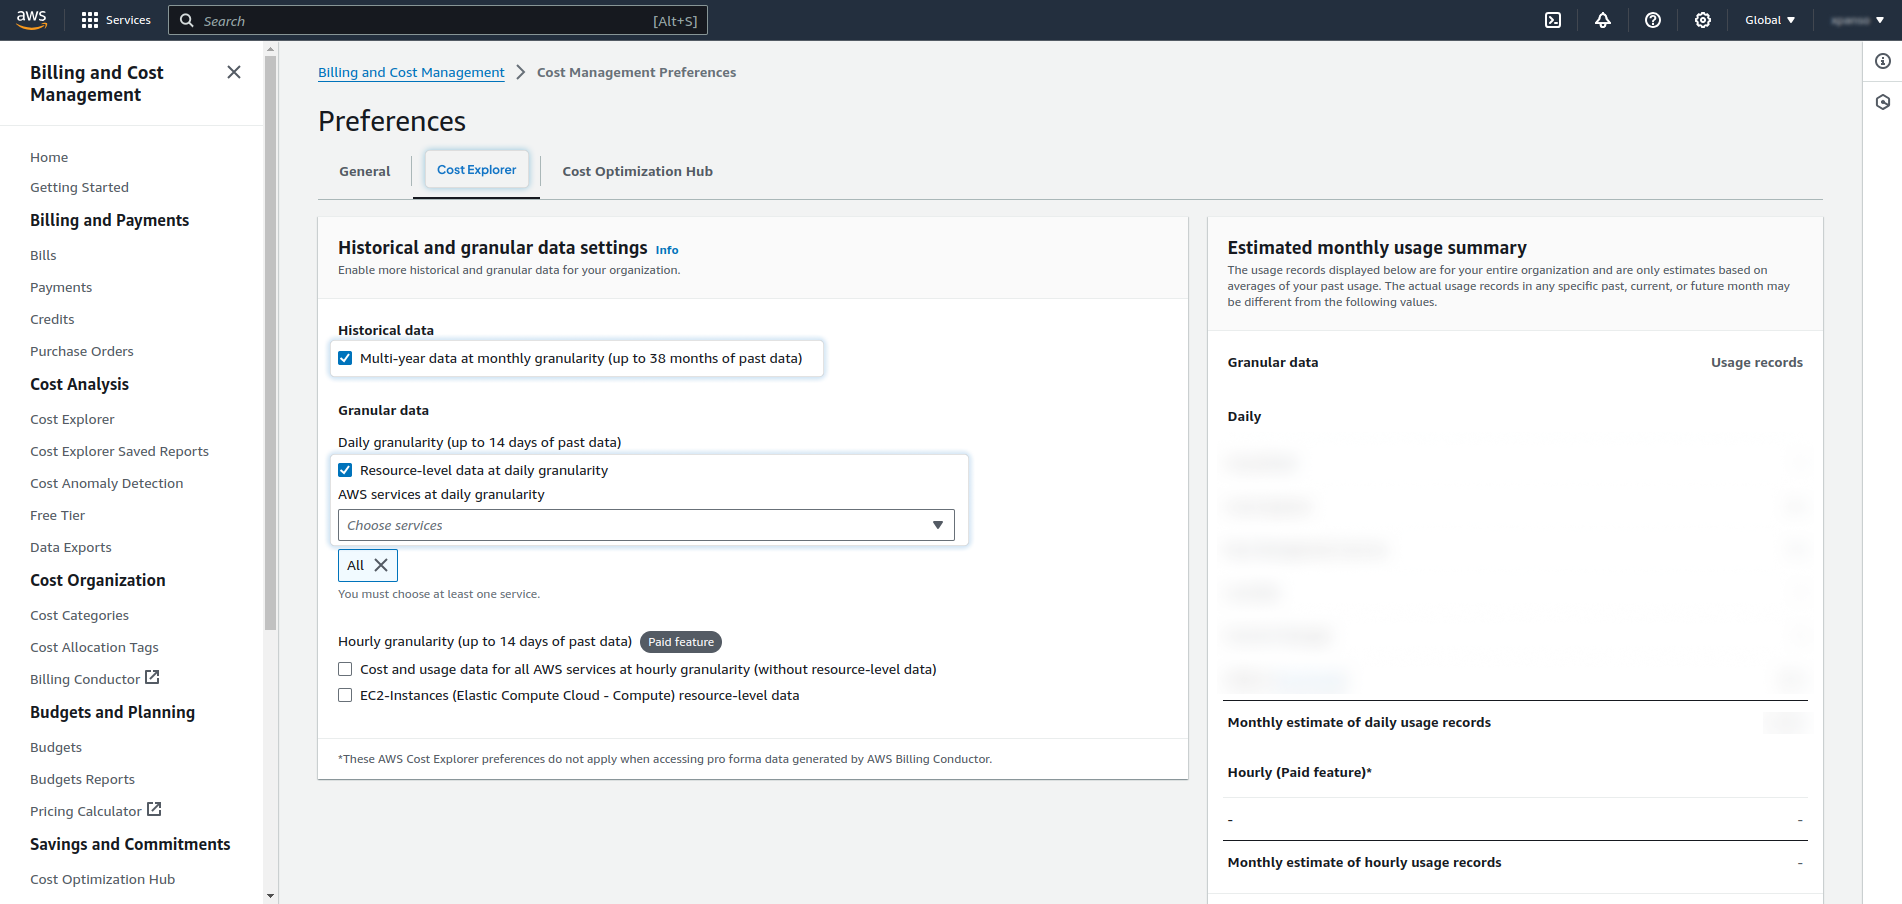
- Enable access for Historical data (Multi-year data at monthly granularity up to 38 months of past data) and Granular data (Resource-level data at daily granularity). This has to be done from the master account (Organization’s payer account).
# Access For Cost Explorer API
- To get better visibility about AWS infrastructure spending through our OptimoAnalytics dashboard, it is recommended to grant us access to Cost Explorer API.
- We need access for the below API: 1. ce get-cost-and-usage 2. ce get-cost-and-usage-with-resources
- In the case of EC2 instances/resources, CloutOptimo shows EC2 instance's cost and CPU utilization. Which will help the user to identify whether the user is spending cost on the resource which has very low CPU utilization.
- CloudOptimo make a call once in a day for daily data collection and once in a month for monthly usage. We store this data and users will be able to view this data without any cost incurred.
# Which cost metric do we use?
In the OptimoAnalytics dashboard, we represent data in graphical as well as tabular format.
AWS provides different types of cost as per resource type e.g on-demand, reserved, spot.
The cost types are :
- Unblended costs
- Amortized costs
- Blended costs
- Net unblended costs
- Net amortized costs
If you only have one account or you do not have a consolidated billing setup or you do not use reserved instance then the blended costs are the same as the unblended costs and are the simple usage costs.
Unless you're a customer who has bought Savings Plans or Reservations, then the actually true dataset for evaluating the expense patterns is amortised costs.
Unblended costs are the sum of the applicable rates times the usage for each AWS resource and represent the common understanding of incurred cost.
Currently in OptimoAnalytics dashboard every cost is unblended cost.
CloudOptimo shows EC2 instance cost, usage, and CPU utilization where the user will be able to make quick decisions whether to upscale or downscale at a single glance.
We also show cost representation along with different services, purchase option, and usage.
# Unsupported Regions
CloudOptimo does not support the below regions. The resource in below-mentioned regions won't be considered for either CloudOptimo product.
- Asia Pacific (Hong Kong): ap-east-1
- Africa (Cape Town): af-south-1
- Middle East (Bahrain): me-south-1
- China (Beijing): cn-north-1
- AWS GovCloud (US): us-gov-west-1
- AWS GovCloud (US-East): us-gov-east-1
# Enable AWS Region
- Go to AWS Management Console and sign in with master account.
- In the right corner, you will see the master account name. Click on the name and in the dropdown options select Account.
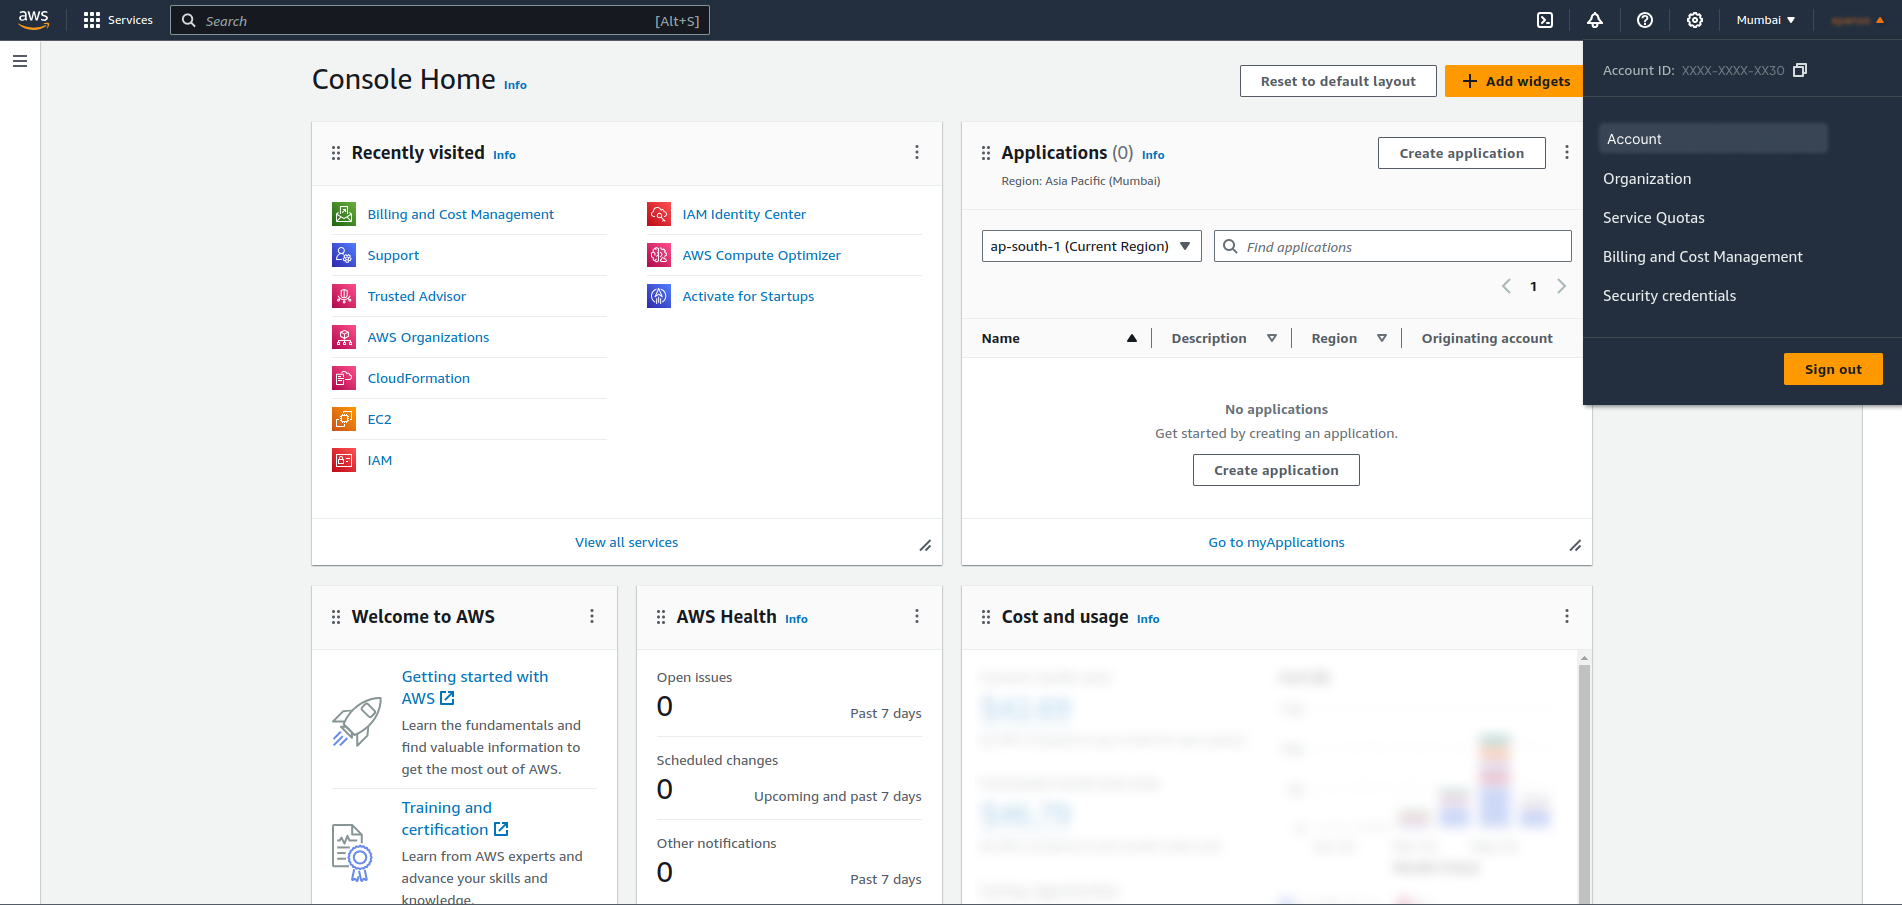
- Scroll to AWS Regions section.
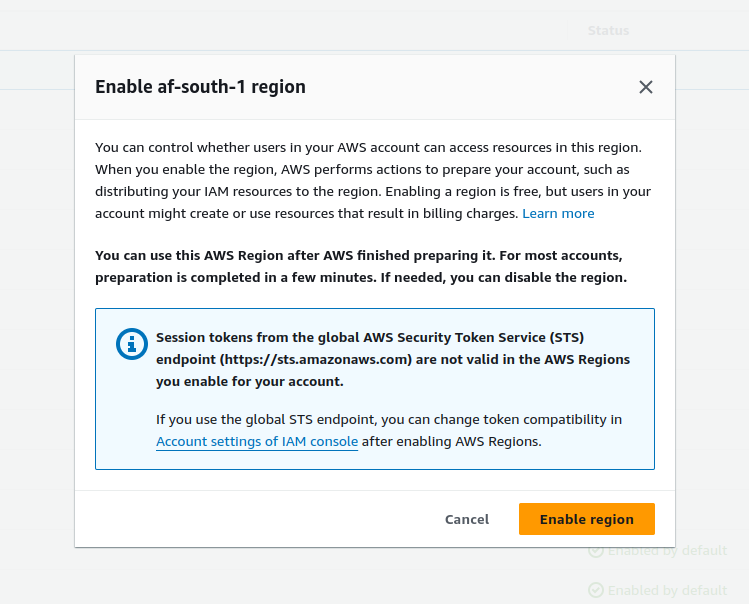
- Identify the region which you want to enable and click on the Actions column Enable link.
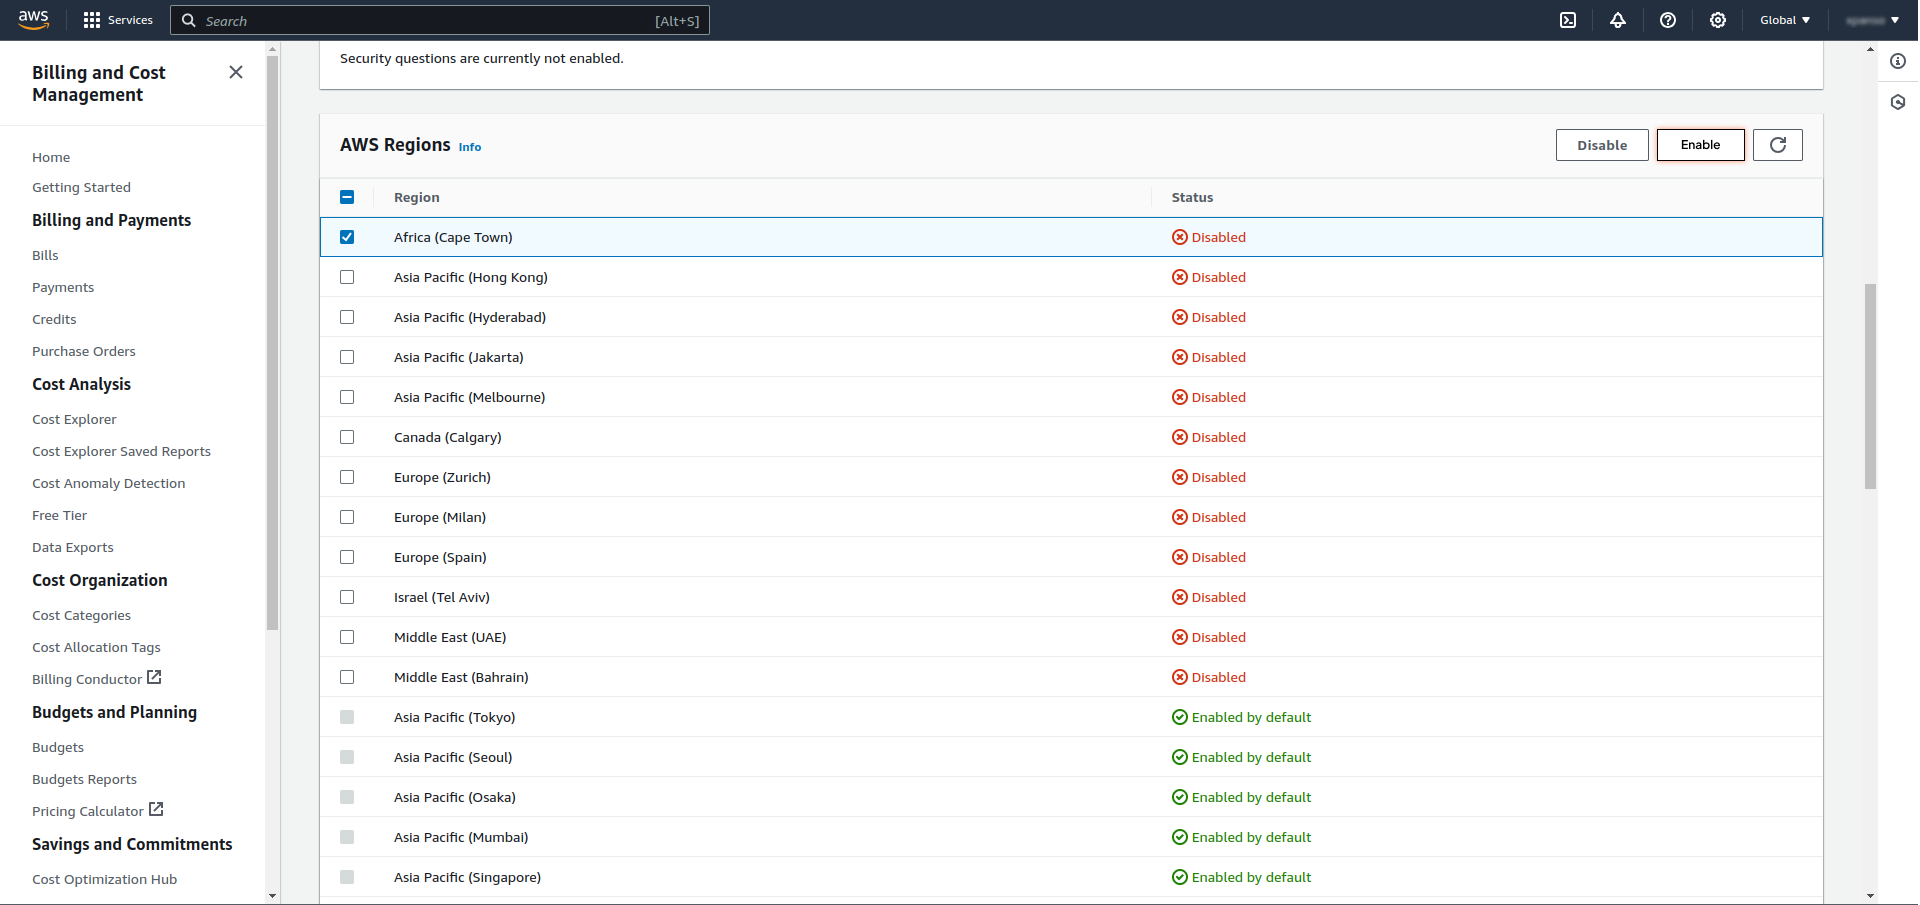
- It will open a dialog box. Click on Enable region .
# Disable AWS Region
- To disable the region, on the account page, scroll to AWS Regions section. The Actions column will have Disable link.
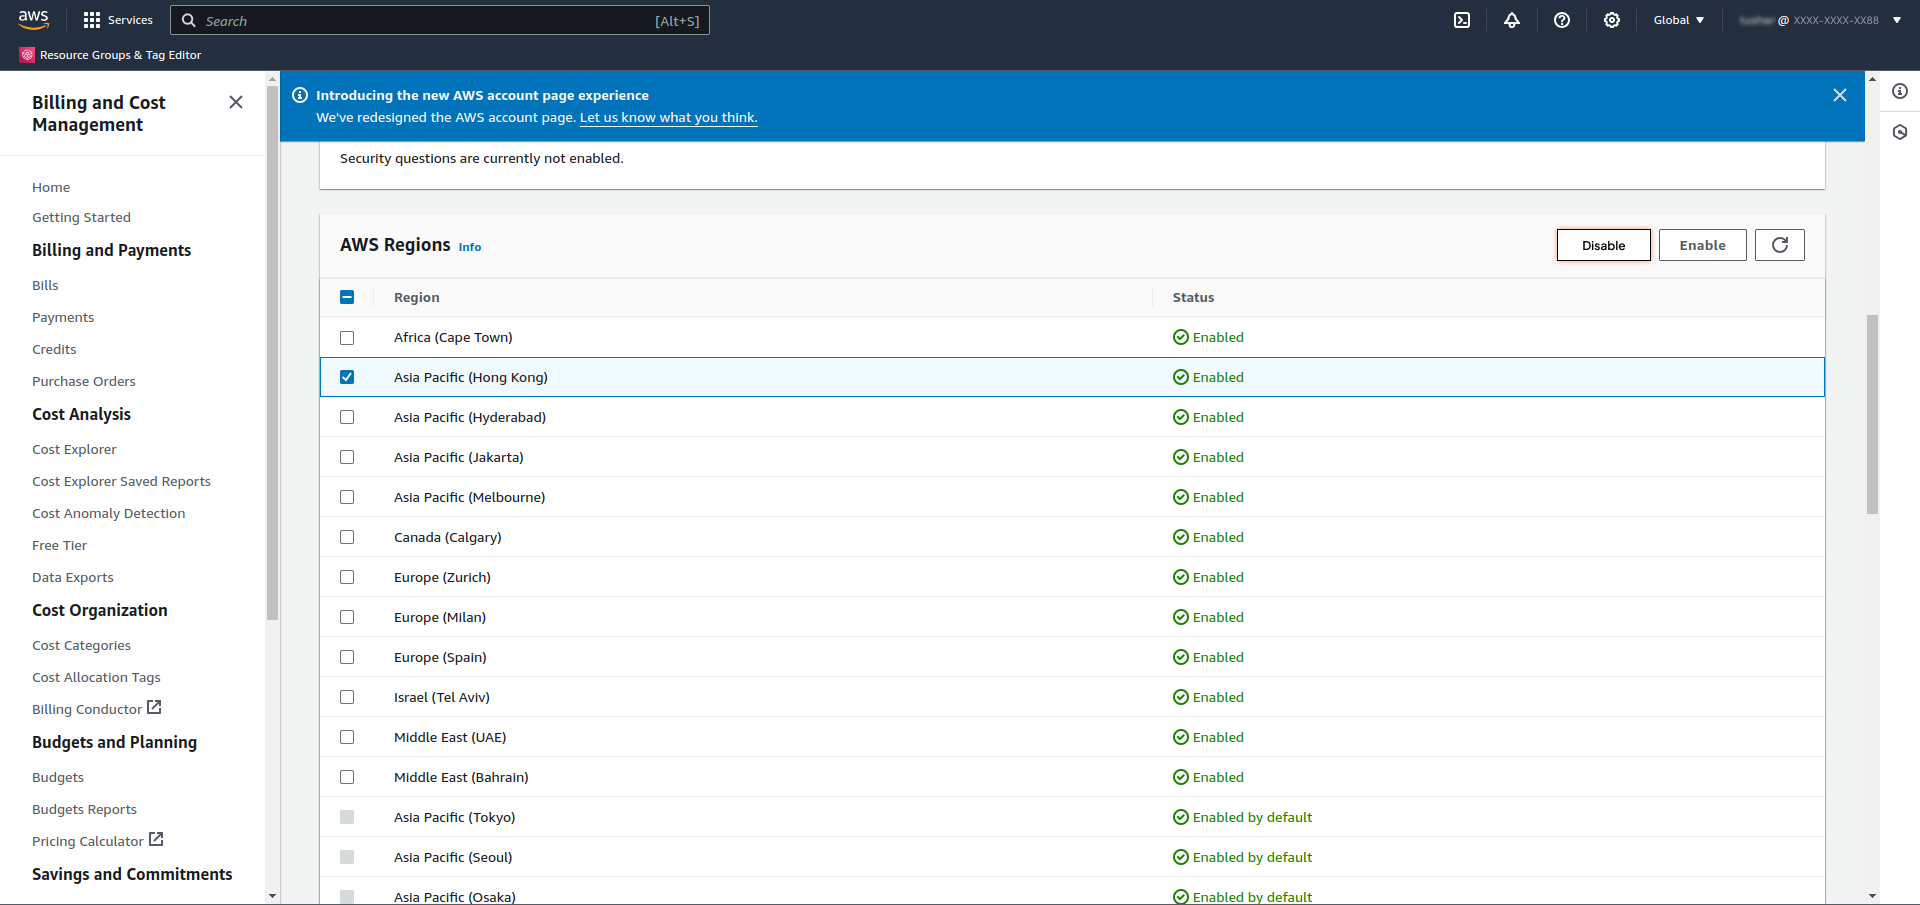
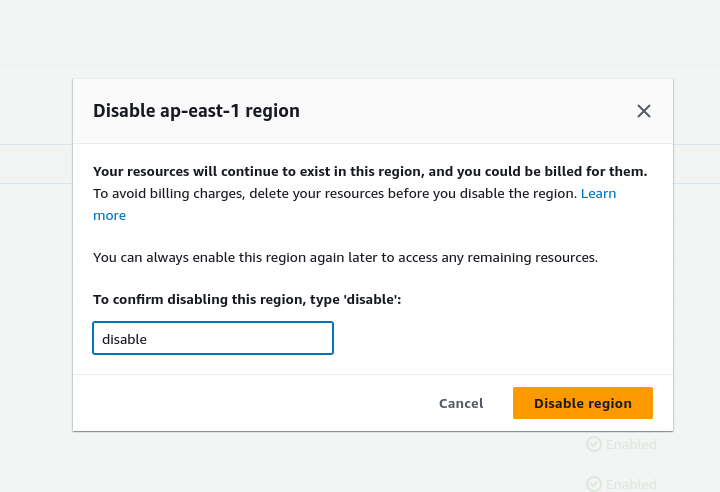
- It will open a dialog box. Click on Disable region .
