# AWS Integration
# Overview
Security was designed into CloudOptimo from the beginning. We follow AWS best practices for cross account access by utilizing cross account IAM roles that only have the minimum required permissions. This role is setup by a Cloud Formation template during the signup process. Once in place, AWS will enforce that only the CloudOptimo account can assume this role, and only when a predetermined ExternalId generated during the signup process is provided. All access is also recorded and audit-able via Cloud Trail.
For more information, please refer below links:
- How to Use an External ID When Granting Access to Your AWS Resources to a Third Party
- Using an IAM Role to Grant Permissions to Applications Running on Amazon EC2 Instances
# Integration Process
Let's see how to integrate your AWS Account with CloudOptimo in a step by step process.
# Step 1:
AWS CloudFormation templates helps our users get up and running with just a few clicks or commands. We have created pre-configured Cloudformation Stack Link that can help you integrate with us faster.
Click on "Create CloudFormation Stack" button. It will open AWS CloudFormation page in a new window.
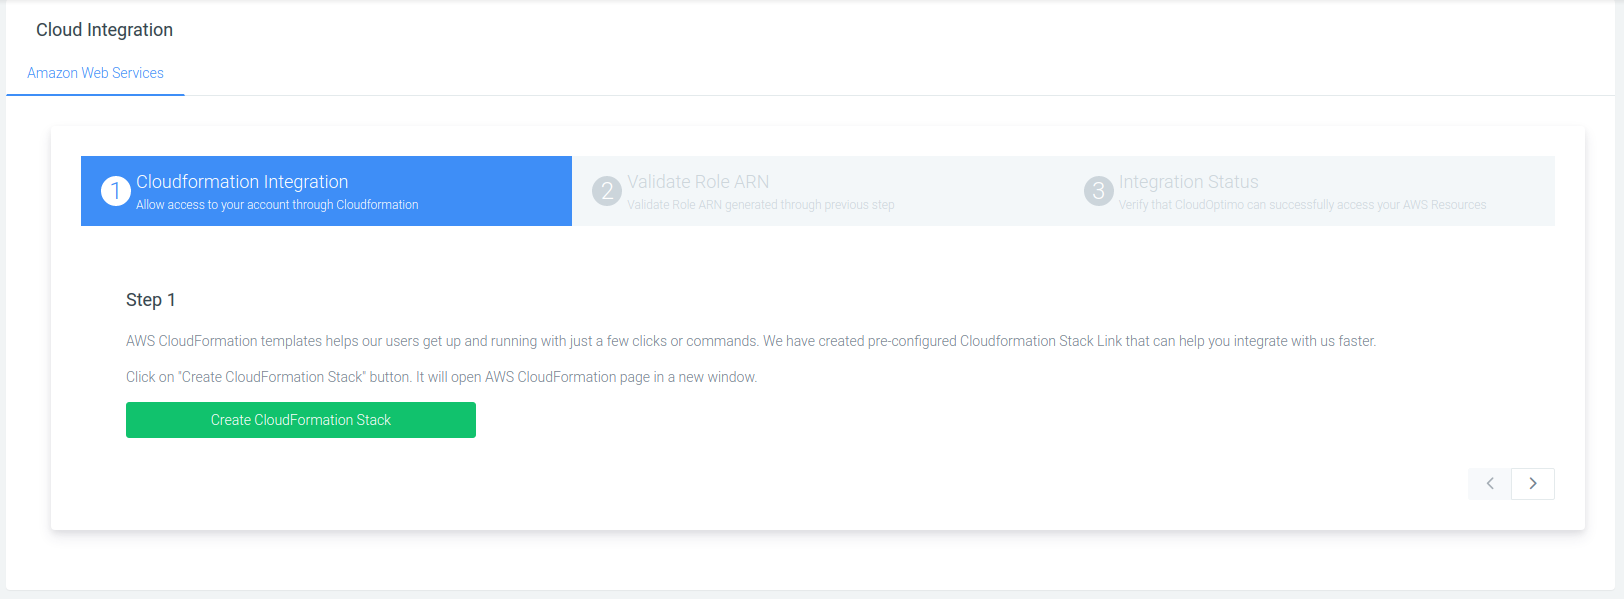
Step 1: CloudOptimo Console
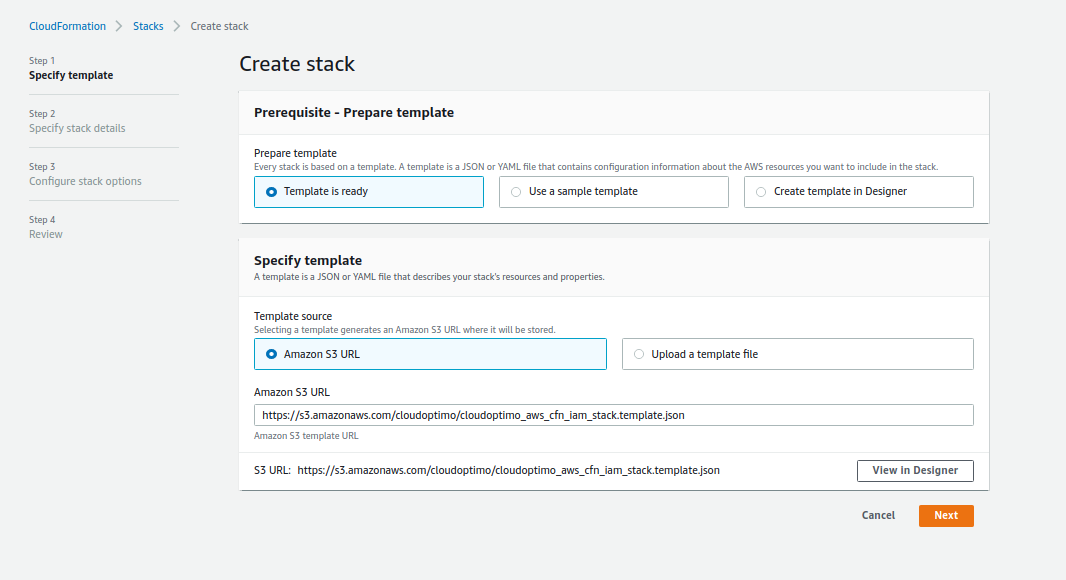
Step 1: This is how it will look like in AWS Console
# Step 2:
You now will be on "Create stack" page. On this page, Click on "Next" button.
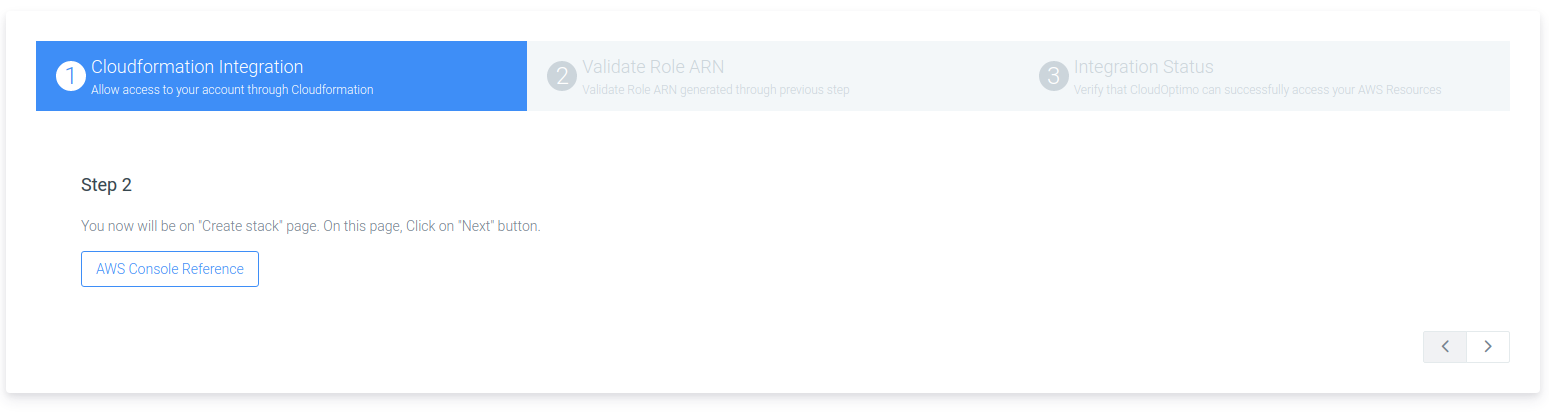
Step 2: CloudOptimo Console

Step 2: This is how it will look like in AWS Console
# Step 3:
You now will be on "Specify stack details" page. On this page, enter unique name in field "Stack name".
On same page, please copy given identifier in the field "External Id" and click on "Next" button in AWS Console.
Kindly note that this identifier changes on every page load and has to be unique for a client.

Step 3: CloudOptimo Console
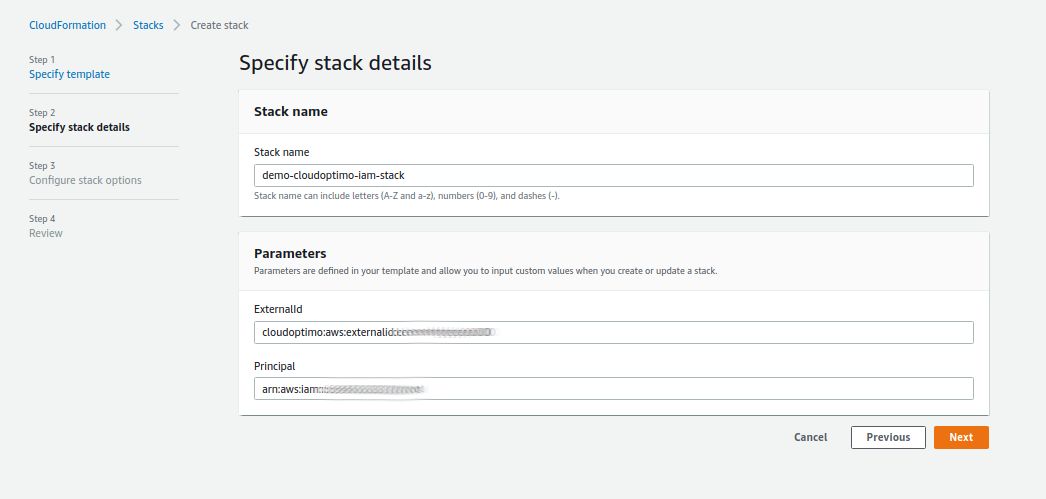
Step 3: This is how it will look like in AWS Console
# Step 4:
Skip Configure stack options Tab by clicking on "Next" button.
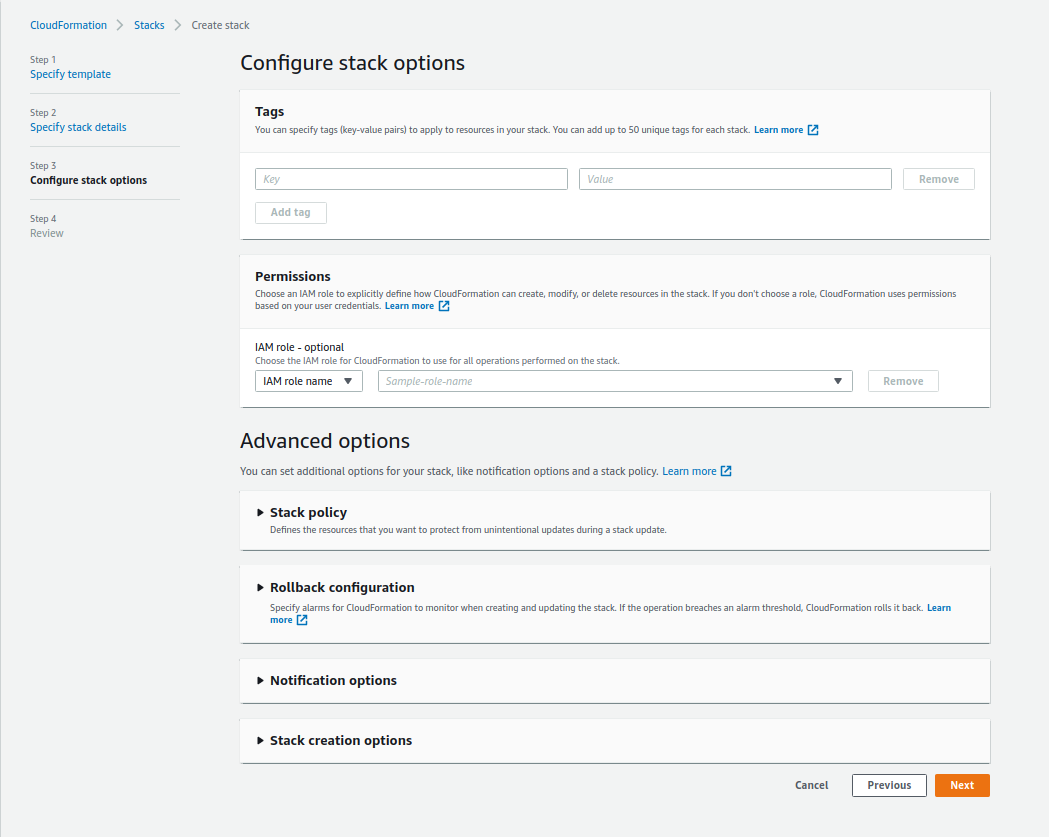
Step 4: This is how it will look like in AWS Console
# Step 5:
You now will be on "Review" page. Please click on "Create stack" button after accepting terms and conditions.
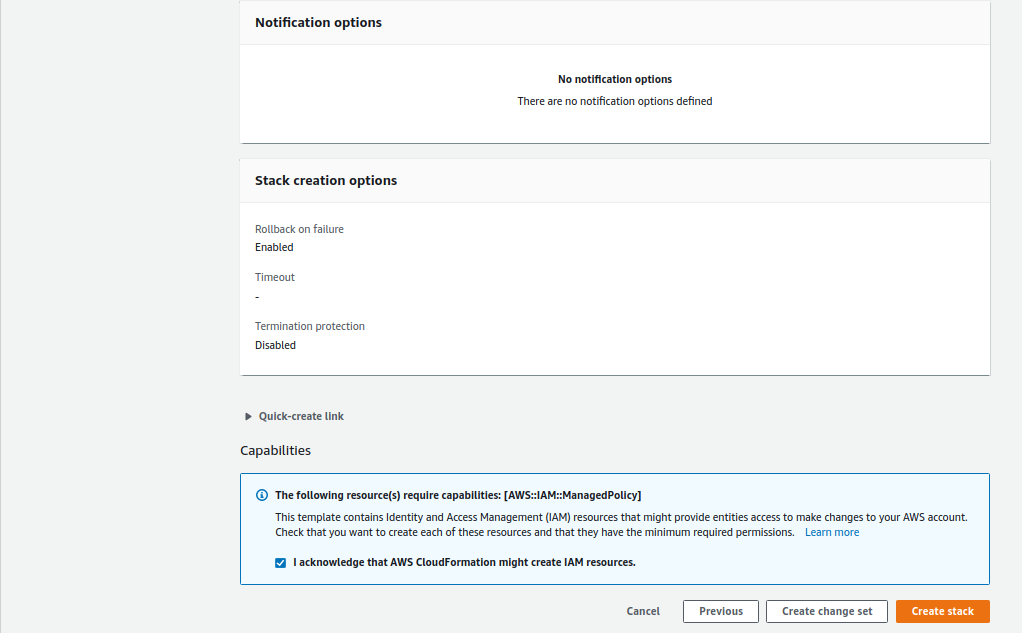
Step 5: This is how it will look like in AWS Console
# Step 6:
Once the stack creation is completed(it takes approximately 4-5 minutes), go to "Resources" tab and click on Physical ID of IAM role we just created.
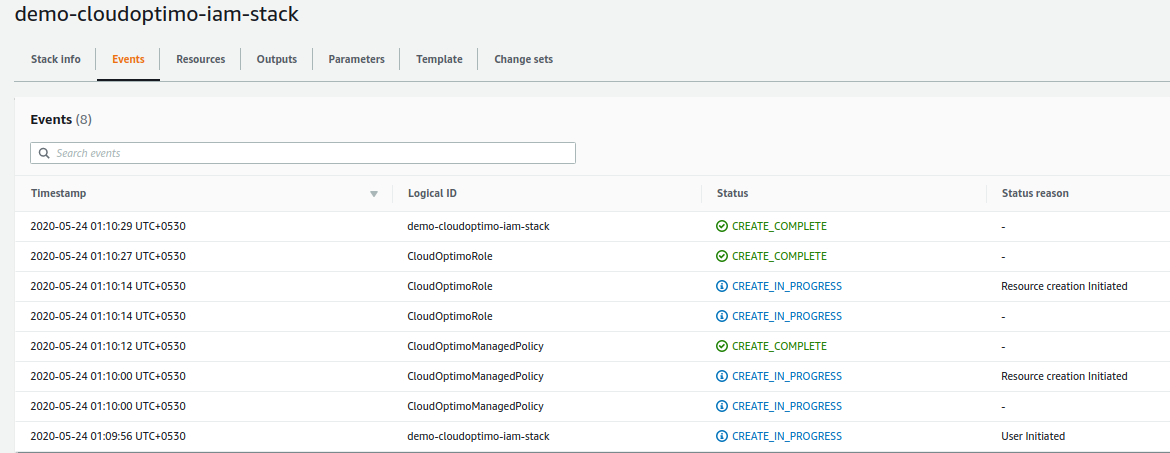
Step 6: This is how it will look like in AWS Console
# Step 7:
Now go to "Resources" tab and click on Physical ID of IAM role we just created.
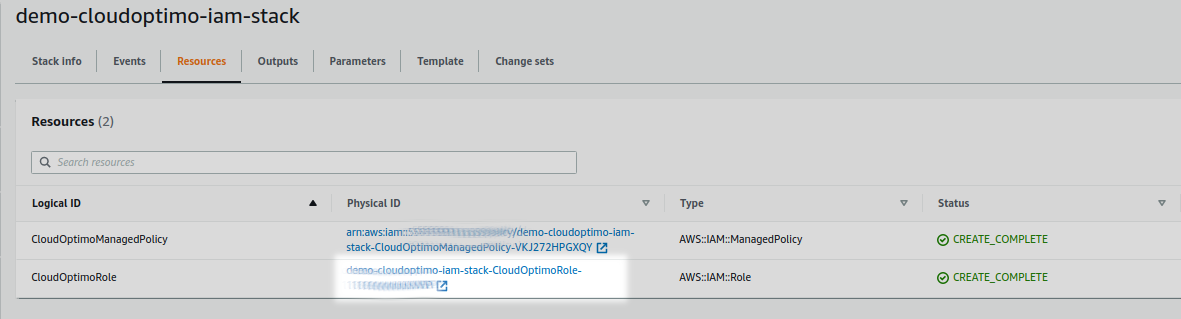
Step 7: This is how it will look like in AWS Console
# Step 8:
Now copy the Role ARN from AWS page and click on "Next" button here to validate Role ARN.
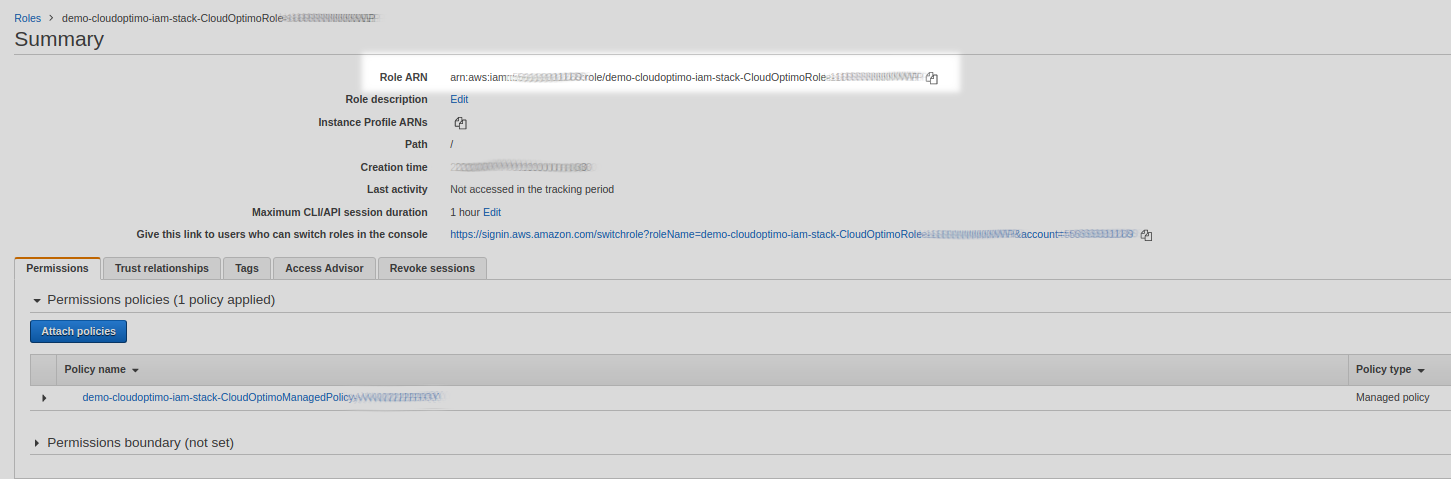
Step 8: This is how it will look like in AWS Console
# Step 9:
You will come on the last page of the wizard where you are supposed to paste the Role ARN you copied in the last step.
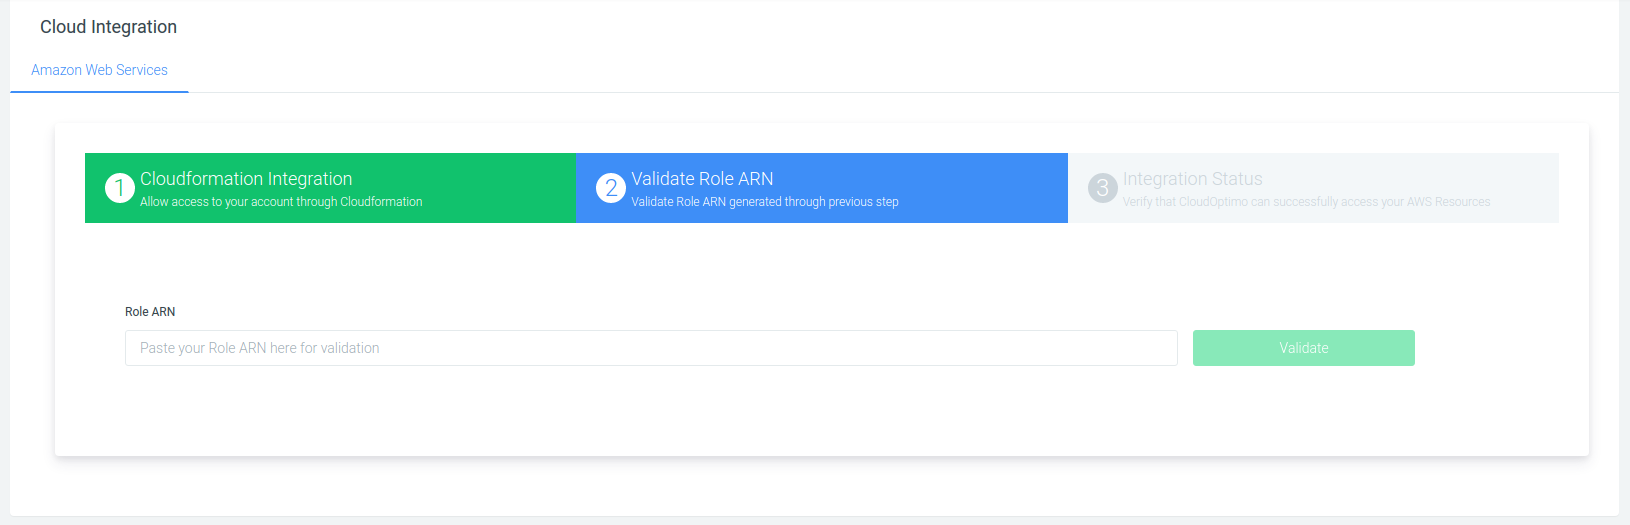
*Step 9: Success!
If all previous steps have been followed perfectly, the integration process would be completed and you can get started to use CloudOptimo.