# CostSaver
# Overview
CostSaver will help you to gain fine-grained visibility and segregation of your cloud spending based on deployment environments and application architecture. It allows you to easily track budgets and analyze spending patterns to reduce waste and lower overall costs in the cloud. You simply need to tag your instances based on deployment environment and application architecture.
We also allow you to schedule saving analysis activity to take control of cost and continuously optimize your spending on daily basis.
# Why Tagging Is Important?
AWS tags can help you understand and control your AWS costs. AWS provides a thorough document of their best practices for tagging resources that can be used in many different ways. Tags are useful to segregate resources belonging to different environments. It also allows top management to analyze costs and the teams or business units responsible for each resource.
# How to use CostSaver?
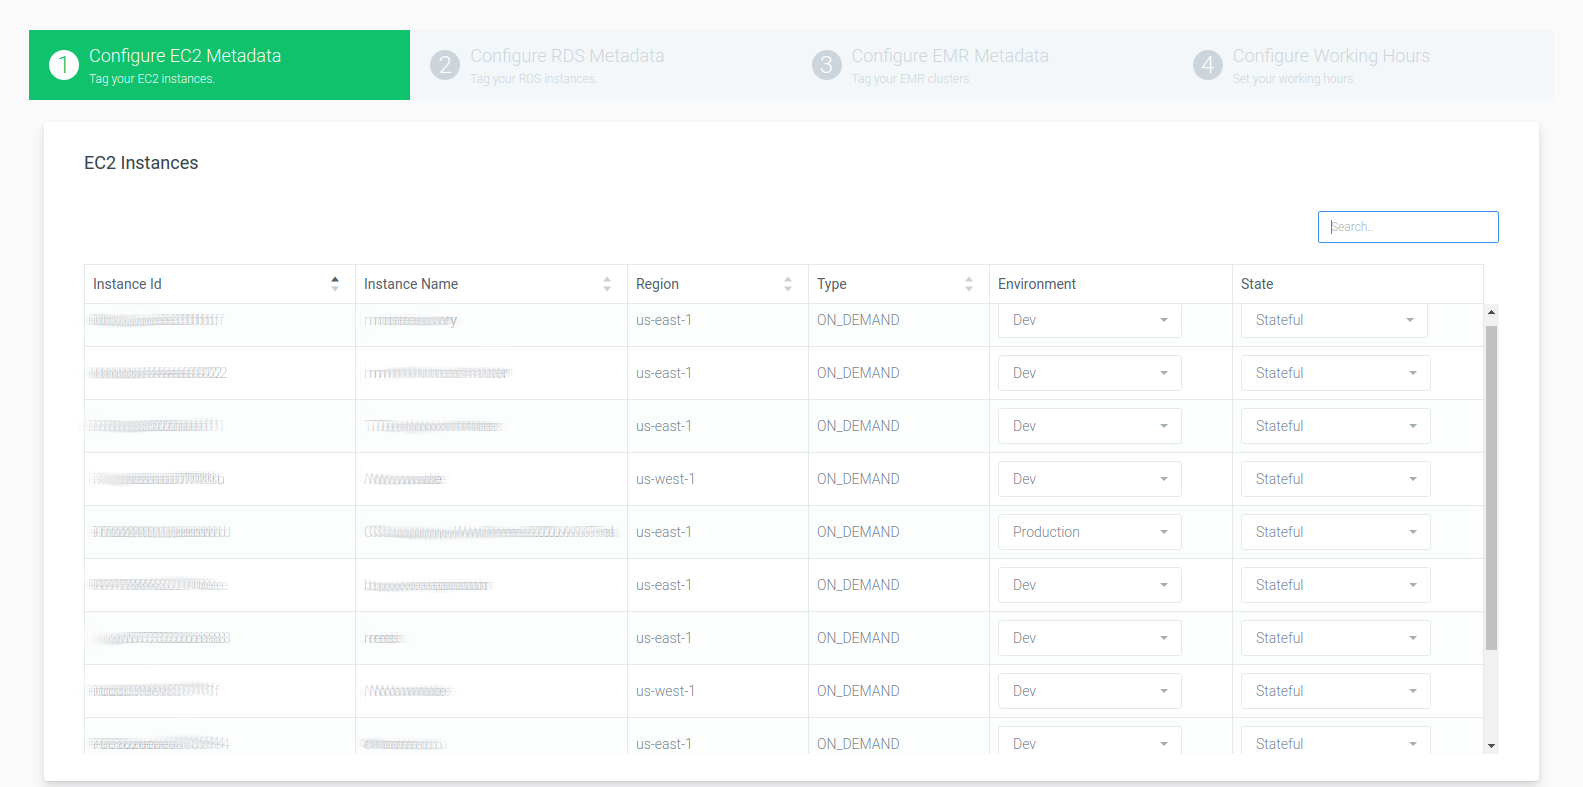
It just takes 4 steps to configure your CostSaver.
Step-1: Tag your EC2 instances based on deployment environments and application architecture.
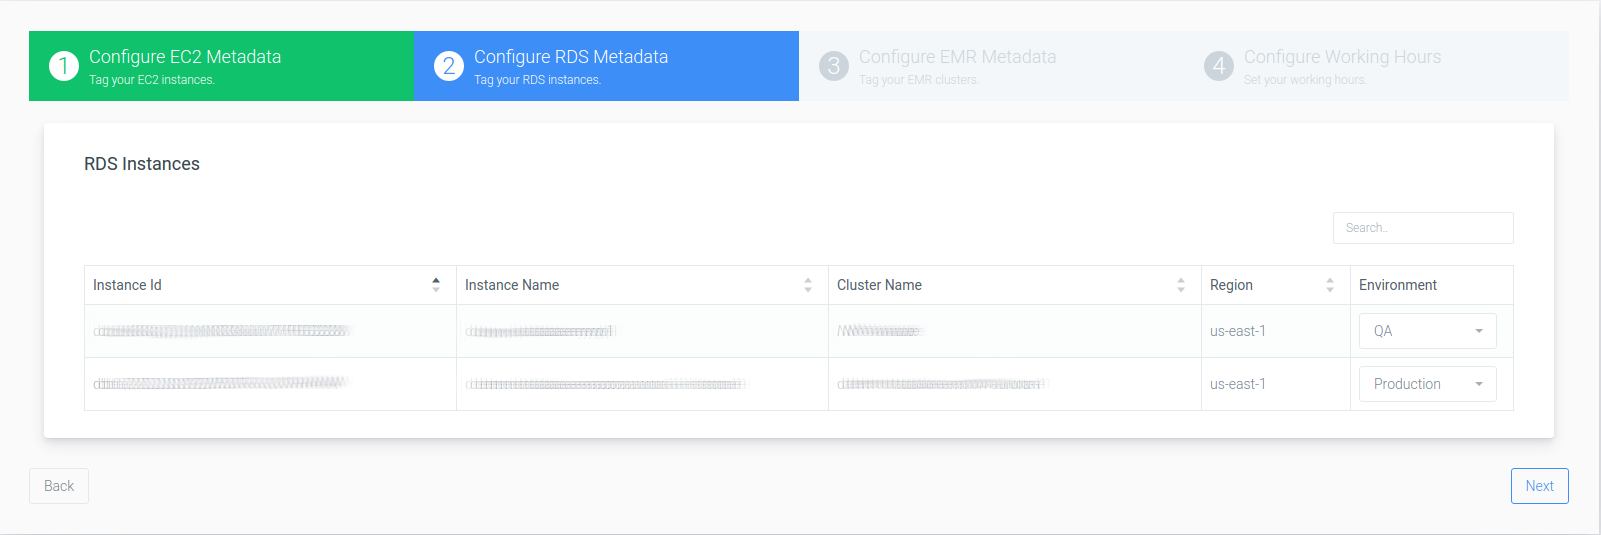
Step-2: Tag your RDS instances based on deployment environments.
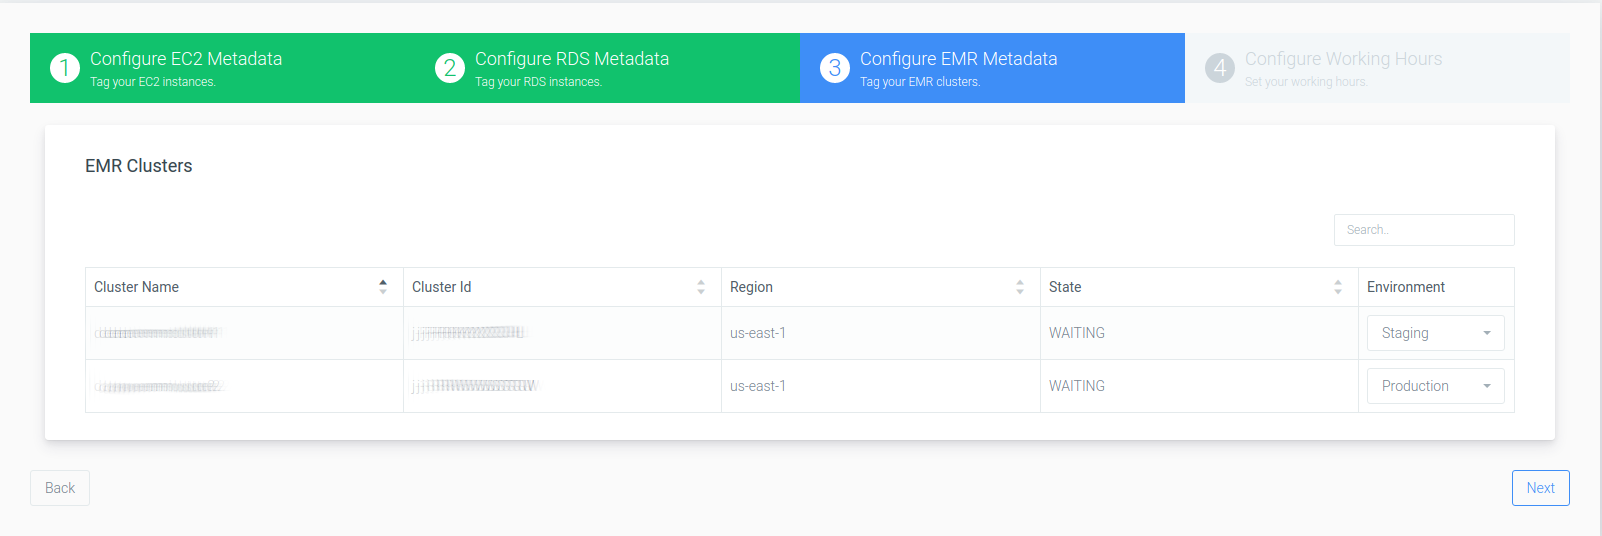
Step-3: Tag your EMR clusters based on deployment environments.
Step-4: Set your general working hours.
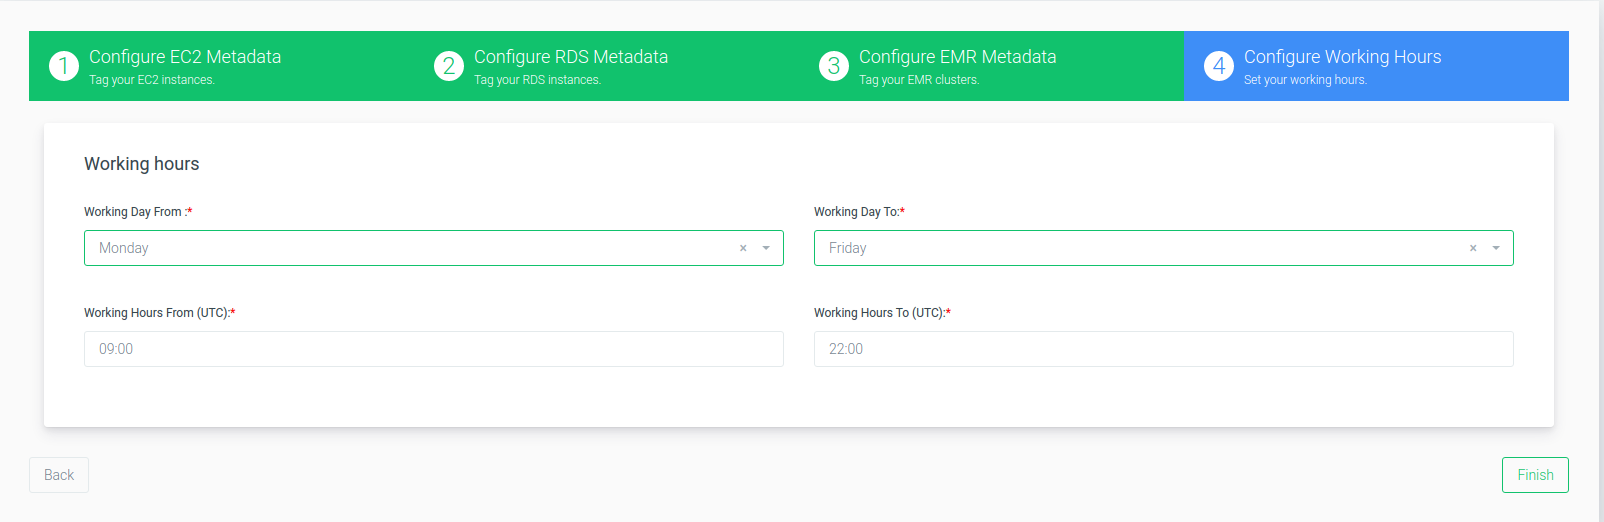
Done, you're all set to run your CostSaver !!!
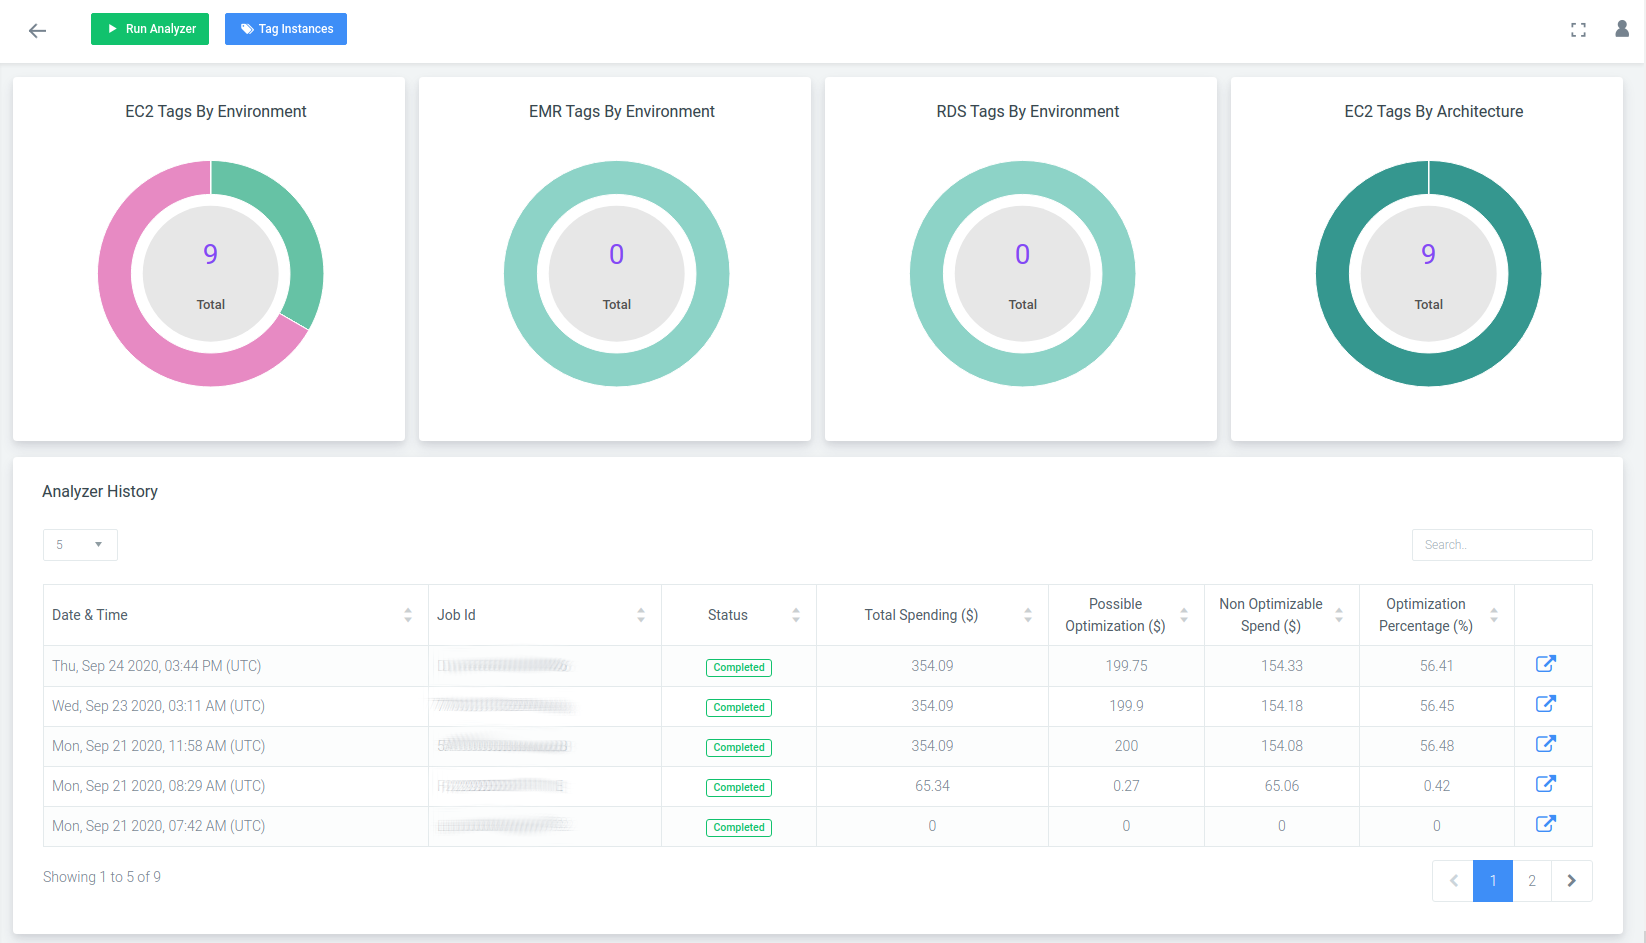
Once finished, the first run of CostSaver will be initiated and you will be redirected to the CostSaver dashboard where you can see the segregation of your AWS resources based on tags configured in the above-mentioned steps. Using the CostSaver dashboard, you can track the history of CostSaver runs to observe total spending and possible optimization patterns.